The Snapmaker Vs Glowforge are 3D printers that use lasers to create objects from various materials. The Snapmaker is a more affordable option, but the Glowforge is more versatile. If you consider investing in one of them, this is an excellent place for you. In this article, Byboe will show you the advances and disadvantages of both, and you will know which is suitable for you.

Table of Contents
Glowforge
- Machine Dimensions: 38 in wide x 20.75 in tall x 8.25 in deep
- Touchscreen Size: n/a (own device used)
- Power Requirement: 110/220 VAC, 50 or 60 HZ outlet
- Software: Glowforge web interface app
- Operating System: Windows, macOS, or Linux
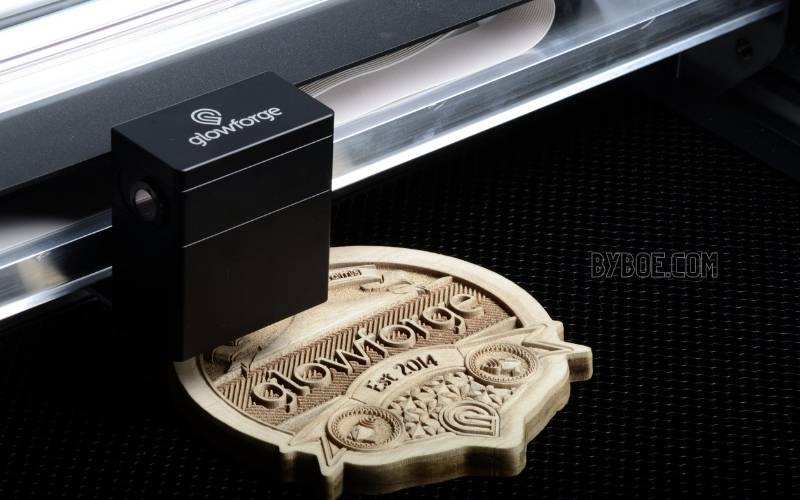
The Glowforge also falls outside of the traditional 3D printing range. The company calls it a 3D printer, but it does not use extrusion technology to create layers.
It is more accurately called a laser cutter. This means that it uses concentrated light beams to etch designs in various materials.
Glowforge, a company based in Seattle, Washington, claims that its products have produced over 2.1 million projects since their launch in 2014.
This was after their successful crowdfunding campaign. There are now three versions of Glowforge, each designed to meet the needs of all who need laser printing. Let’s see how they compare!
Pros
Multiple Models: Glowforge has three models now. They all work the same, so you don’t need to learn how to use them again if you want to upgrade your Glowforge.
You’ll get more power and more material feed space. This can be a significant advantage if you look to laser cut large quantities. In the section above, we have compared the specifications for each model.
Glowforge is compatible with many materials: The Glowforge can easily shape any material, from acrylic to stone to leather. This machine’s true strength is its Glowforge.
Users can even create fancy designs on flat surfaces like macaroons. Glowforge has its line of materials, which are compatible with the separate machines. You can also scan QR codes to your Glowforge so that the machine’s settings can be adjusted for the fabric before using it.
Ample Printing Space: Every Glowforge model has 19.5 inches of print space. The Glowforge Pro adds an extension to the feeder, so you can print any length you like. Your material can be as thick as 2 inches and still fit perfectly in the laser cutter’s 1/10th of an inch precision.
Excellent Detail: This precision is combined with live camera preview and image editing to produce professional laser etching, regardless of which Glowforge model you choose. You can show the details of photos, the edges of designs, and everything with varying laser power and leveling levels.
Glowforge is easy to use. It can be set up in less than 30 minutes. Reviews back this claim. The Glowforge app allows users to get started.
You can create a free account, connect to your laser cutter, and upload project images. You can then upload your project images, view the preview camera and adjust your designs. Finally, you can choose the presets or change manual settings for your materials.
The app’s instructions are intuitive and straightforward, according to users. You won’t have to spend your entire first day trying to figure it out.
Cons
Large Size: Because of its large printing area, Glowforge has a massive footprint for a desktop printer. It’s a rectangular shape with rounded edges, so you can easily find storage space for it.
Glowforge is expensive: Although it excels at its job, the price tag for the Glowforge basic engraver is almost $3,000.
This is an excellent investment if your goal is to have a mass-production engraving machine that you can sell, but it might not be within your budget if you are a hobbyist and don’t want to recoup costs.
Access to the Internet is required: The main problem with owning a Glowforge is that its controls won’t work without it being connected to the internet.
Although it may seem like a minor issue considering how many other devices use the same technology, users who live in areas without reliable internet access will have their Glowforge stop working. Access to the internet is essential for Glowforge users who don’t have access.
Dangerous Fumes: Glowforge’s fumes are a significant safety concern. Your Glowforge must be used in well-ventilated rooms, with either fan hoods or windows that open.
You can also purchase a ventilator from Glowforge to connect to your laser cutter if you don’t have the space. However, this will add $400.

Snapmaker
- Dimensions of the machine: 11.4 inches high x 10.7in wide x 13.2in long
- Touchscreen size: 3.5 in
- Power Requirement: 100V AC – 240V AC
- Operating System Windows, macOS, Linux
- Prices for all three modules in the first version: $449; for 2.0, $1559
- 3D printing area 4.9 inches high x 49 in high, x 4.9in long
- 3D Printing Layer Resolution 50 – 300 microns
- 3D Printing Speeds up to 100 mm per Second
- Laser Engraving Area: 4.9 inches wide x 49 in long
- Laser Engraving Power 200mW
- Laser Engraving Wavelength 405nm
- CNC Work Area 2.0 high x 3.25 in wide x 3.35 in long
- CNC Shank Diameter 3.125 mm
- CNC Spindle Speed 19,000 RPM
Snapmaker creators describe it as a game-changer and a time-saver. The company Kickstarter raised $2.2 million to create the first version. Now they are working on version 2.0.
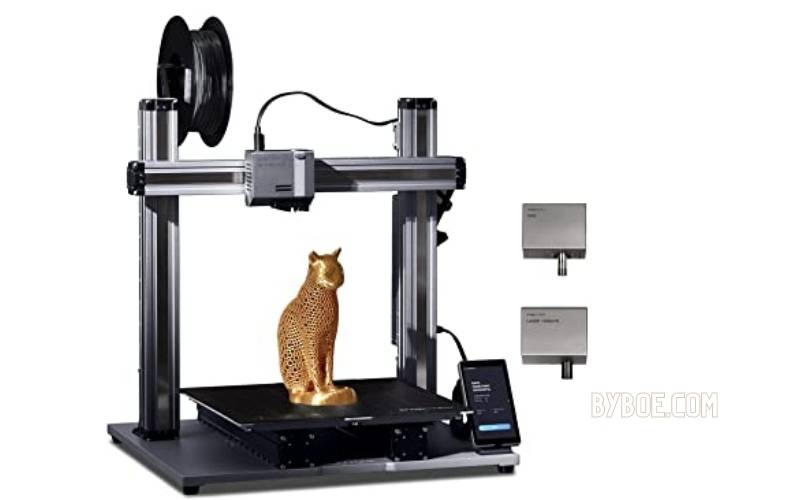
The Snapmaker’s two versions are made up of linear construction modules. This means that rotation motions are converted into linear movement along X, Z, and Y axes for working with 3D objects.
Although the main body contains space for all three processes simultaneously, the design screen and each processing element plug into a central connector. This tells the printer what you want.
This machine can 3D print, laser engraving, and CNC carving. There is a lot to this machine.
Pros
3D printing is an additive construction method that extrudes layers of softened filament over each other in precisely designed shapes to create 3D objects.
An extruder nozzle heats the filament and then pulls it into the correct dimensions according to the computer-generated object plan. This process can create unique figurines, toys, and medical tools quicker and cheaper than other processes.
Laser engraving: This aims at a concentrated light source at an area to burn designs, words, and pictures. The engraver can be used as a stylus and can produce various effects to create complex visuals.
This is similar to how a painter mixes different brushstrokes into one piece of art. The laser engraver can be controlled by computer and not by hand. Its movements are determined by the design of the program.
CNC: This stands for Computer Numerical Control. It refers to a carving process that uses the same X-Y and Z plane mappings as 3D printing. CNC, unlike 3D printing, is subtractive manufacturing. This means that CNC uses materials to create layers. CNC is most commonly associated with wood carving but can also make original designs on many surfaces.
Price: The Snapmaker is a great deal at less than $500 for the first generation. Even if it only performs one process, its price would still be very affordable.
The Snapmaker’s modular construction makes it a reasonable investment for makers with limited budgets or hesitant to spend too much on new processes before finding out how they like them.
Although the Snapmaker 2.0 is more expensive at $1,600, it remains an excellent value for a three-in-one machine. It also gives you important updates from the original generation.
All-Metal Construction: The Snapmaker is constructed from aluminum alloys. This means that other metals can be added to aluminum to improve its strength and properties. The Snapmaker’s solid base keeps it in place and prevents tools from slipping or jerking while creating.
Compact: The Snapmaker’s module construction is a massive advantage over its competition. The Snapmaker has a smaller storage footprint than single-process printers because the equipment for each process is integrated into the main machine.
Snapmaker 2.0: Snapmaker was initially a Kickstarter project. Snapmaker listened to the feedback of its first adapters and made immediate improvements.
The second generation includes concrete details that address a lot of the issues of early users, including an automatic calibration option and greater power to the laser engraver; expanded UI options on touchscreen control; and more space for each process’s workspace. It seems that the company is actively preparing for future versions.
Cons
Lack of Speed: Snapmaker’s slow 3D printing speeds are a common complaint. Although this doesn’t affect the quality of the final objects, users and reviewers agree that it makes them more challenging to construct. The 2.0 is not a fast 3D printer.
Limited Software: The Snapmaker ships with Luban, their proprietary control software. This is designed to manage the design and control of all three aspects.
Many users find it challenging to use for module control and less robust than needed. The company recommends adobe products to create designs beyond a certain level. You can also use third-party software to import G code files.
Wifi Connection Interferes With Local Machine Control: The machine’s control side does not allow you to use local machine control when connecting with wifi. This means that you cannot access cloud storage to downloads during printing or perform laser engraving. If you have many tasks, this can slow down your make time.
Uneven First Layer of Prints: The Snapmaker’s bed-leveling system for 3D printing surfaces was another aspect that was not updated for 2.0. You can adjust it in increments of 0.05mm, but this does not affect the automatic leveling.
You can also turn off the automatic leveling and manually level your printing bed for a better result. However, paying extra attention to your first layer of paint is essential to ensure that it does not go wobbly.

Main Differences Between Glowforge Vs Snapmaker
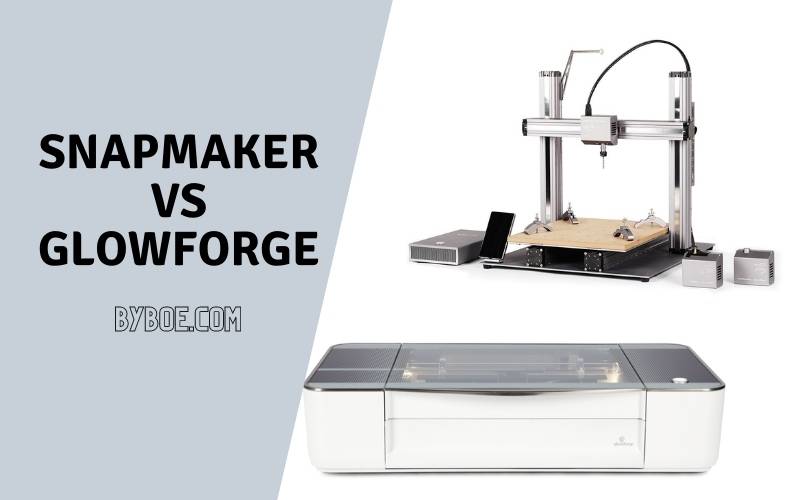
Snapmaker can perform 3D printing, laser engraving and CNC carving. The Glowforge, on the other hand, is a machine that is only capable of laser engraving.
Snapmaker has modules you can connect and then disconnect. The Glowforge, on the other hand, is all contained within one case that you cannot alter.
Snapmaker’s original model is under $500. The 2.0 version costs less than $1600. While the Glowforge ranges from under $2,000 to under $6,000, depending on which model you choose, the Snapmaker’s first model is under $500.
Snapmaker 2.0 vs Glowforge Plus 3D Laser Printer
Glowforge vs snapmaker 2.0 were compared. Snapmaker and Glowforge machines provide precision, accuracy, and clean laser cutting. The top-quality laser cutting and engraving machines allow for endless possibilities in creating many things. We will highlight the key differences so you can make an informed decision.
Glowforge Plus is our favorite laser because it can cut through wood with one pass. Laser engravers can also engrave metals such as aluminum and anodized titanium.
The pass-through slot allows you to engrave unlimited lengths. This machine is ideal for small businesses that require a reliable and robust laser cutter with a large build area.
Snapmaker 2.0 is equipped with a powerful laser module, but it’s less efficient than the Glowforge. Snapmaker will make it difficult to laser cut through wood. Snapmaker 2.0 is for people who want to use other functions such as 3D printing or CNC carving.
Snapmaker Vs. Glowforge: Conclusion
The Snapmaker is a 3D printer designed to be easy to use, while the Glowforge is a 3D laser printer intended for more advanced users. Snapmaker versus Glowforge printers have their pros and cons, but the Snapmaker is the better printer in the end.
The Snapmaker is easier to use than the Glowforge. It is also cheaper, and it has a larger build volume. We hope that our comparison was helpful for you.
 sərv
sərv
giao banh
động từ
giao banh, có lợi, cư xử, phục dịch
danh từ
cú giao banh

