A laser engraver machine, also known as a laser cutter, is a machine that uses a laser to cut or engrave materials. The laser beam is focused on the material, which then melts or vaporizes away. Laser engravers can be used to create a wide variety of items, including jewelry, furniture, and signage. If you are a beginner, this is an excellent place for you. In this article, Byboe will show you How to Use a Laser Engraver? and other tips
Table of Contents
- 1 Laser Engraver Guide Overview
- 2 How does Laser Engraving work?
- 3 What Are Typical Applications of Laser Engraving?
- 4 How to Use A Laser Engraving Machine?
- 4.1 1. Preparing for Cutting or Engraving
- 4.2 2. The Power of Layers
- 4.3 3. Wood Grains and Engraving
- 4.4 4. Lines that Cross.
- 4.5 5. Lines – Raster Versus Vector
- 4.6 6. For Thinner Vector Lines, Defocus the Laser
- 4.7 7. Add a Vector Score to the Edge or Engravings
- 4.8 8. Attaining the Target
- 4.9 9. Engraving Multiple Objects
- 4.10 10. Use the Red Dot to Find Where to Engrave or Cut
- 5 Designing for Laser Engraving
- 6 Raster Engraving vs. Vector Engraving
- 7 How to Use Laser Cutters: Conclusion
Laser Engraver Guide Overview
Learn the basics of laser engraving technology. This section also explains typical applications and compares them to traditional technologies.
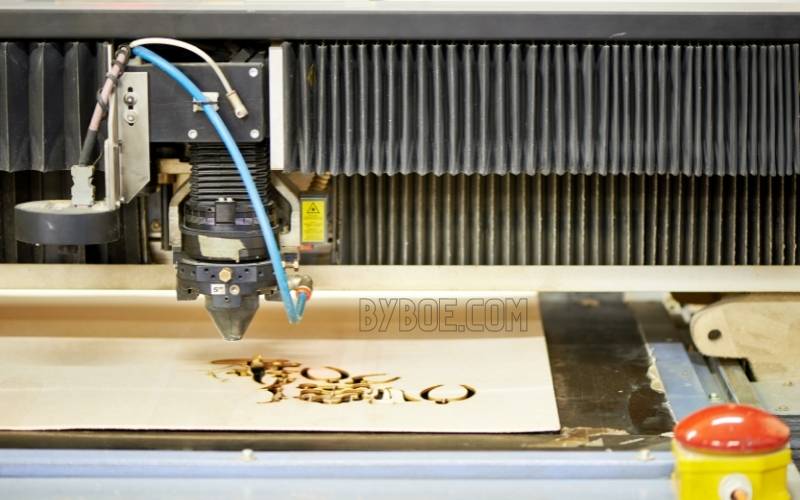
Next, you will learn how to design for laser engraving machine. This section will help you understand the different types of laser engraving materials and how to optimize your laser cutter.
This article will discuss what to look for when purchasing a laser machine (laser cutter). It also provides an overview of the various types of laser engravers available, including both professional and desktop laser engraving.
We end with a few guidelines that will help you choose the best laser engraving service.
How does Laser Engraving work?
The laser beam’s high heat vaporizes the material, laser cutting through the material surface to remove material. This creates a hole in the feeling that is visible and quickly inspected by touch. The depth of the cavity can vary from 0.02 inches in metals to 0.125 inches in more rigid materials.
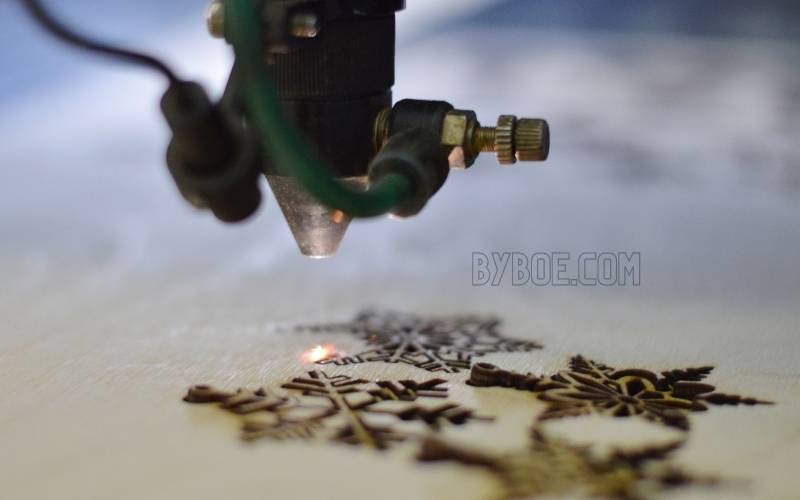
The engraved areas will usually turn black. Multi-layer materials are an alternative as they allow engraving of other colors. The lower layers can be seen by removing the layers at the top.
Relief laser engraving is another type of laser engraving machine. Laser engraving creates deep engravings with distinct heights. This is the most special variant, building a wood sculpture-like effect. You will need a grayscale layout to create relief engravings. The laser can then convert the different values into different heights.
What Are Typical Applications of Laser Engraving?
This method is prevalent for customizing metal, leather, plastics, wood, and glass parts. It is beneficial for adding numbers, logos, and images to roles.
Laser engraving is a popular technology used to produce promotional products such as pens, signs, or displays.
Many consumers are excited about laser engraving, which allows them to create personalized items with their names. Engraved jewelry is one of the most popular applications, such as wedding rings.
How to Use A Laser Engraving Machine?

1. Preparing for Cutting or Engraving
Let’s start by sharing some great ideas about preparing to laser cut and engrave before we move on to laser cutting and laser engraving tips.
Masking: Be aware that engraving smoke can cause stains on the surface. To protect the surface, you can use masking tape.
The masking tape won’t reduce the laser beam power much (bump it up if needed), but it will protect the engraving material from smoke. The masking tape can be removed after the engraving is complete. This is what I use if I am engraving on leather.
Presets: The settings that your laser engraving suggests for cutting and engraving different materials or thicknesses should be available.
These settings should be available for loading into your laser engraving or computer-controlled machine and saving them as presets. It would help if you named them in a way that is easy to find. This will make it easier to find the presets next time you need them.
Test cuts: I always try to make a test cut before starting the actual job. There is nothing worse than taking a piece of material out of the laser beam to find that it did not cut all the way.
I make a small square or circle (about 1/4″ to 1/2″ in width) and then cut it out on a corner or with some scrap material. This allows me to see if the power needs to be increased or decreased before making the final cut.

2. The Power of Layers
Many of the tricks I will be discussing require that you can only print a portion of a file or design at once. This is easiest to put different parts of your design on different layers within a file. Many graphics programs let you create layers, then turn them on and off. There are several benefits to layering.
The order of the cuts. It would help to choose the ranking of lines cut by your laser engraving. However, you can control this by placing different amounts on layers to change the order that each layer prints.
Multiple parts and designs can be stored in the same file. Instead of having separate files for each plan, you can place them together in one file.
Then, add them to the individual layers. You can then print each layer one at a. It helps you keep everything organized.
Guide design. You may need guides to help you lay out your plan. Or maybe you need a target to put an object in. If you don’t wish them to print, these can be placed on their layers and turned off printing.
3. Wood Grains and Engraving
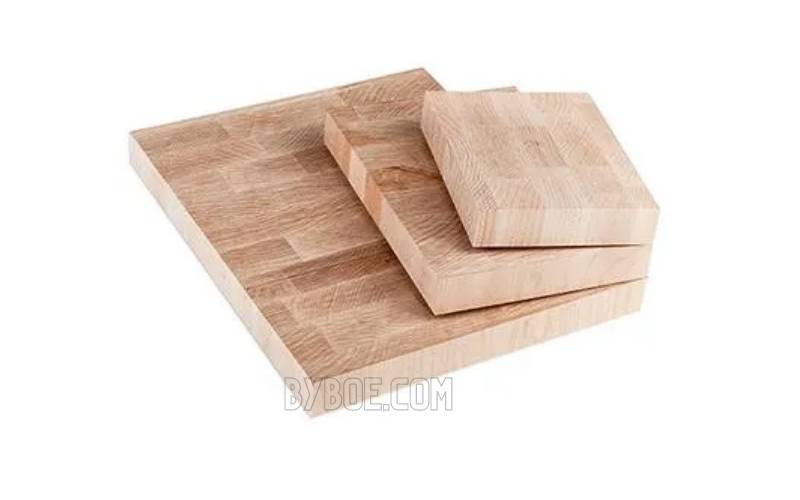
You have a logo or image that you would like to burn onto the wood. Wood can be engraved in many ways, but it is essential to know the differences between engraving on solid wood and composite material such as plywood or MDF.
Natural wood is not the same as manufactured materials. Each wood grain represents a different type of wood growth (winter or summer), and each one will burn differently.
The darker grains are usually harder, while the lighter ones are softer. The example photo shows that engravings end up looking like zebra.
Good plywood with a more uniform top layer will give you better results if you want your engraving to look consistent.
Materials with a thin veneer made of good wood on top are another thing to watch out for. The engraving can often expose the surface underneath, revealing it. You need to ensure that the veneer is not buried in a layer of paint.

4. Lines that Cross.
When use laser cutting multiple pieces at once, it is tempting to stack them against one another so that similar lines overlap. It is a great idea, but good and bad ways to do it.
Let’s take, for instance, a bunch of squares that you need to cut. It will appear that there is only one line between the courts if you draw two squares (each with four sides) and then put them against each other.
This is because even though it appears that there is only one line on each side, the computer still sees two. This means that lines will be cut one after the other. This can result in the edge being burnt rather than being cleanly cut. This can also lead to a waste of time.
This can be fixed by removing one of the doubled-up lines. One of the squares with three sides should be drawn, and the other should have four sides.
5. Lines – Raster Versus Vector
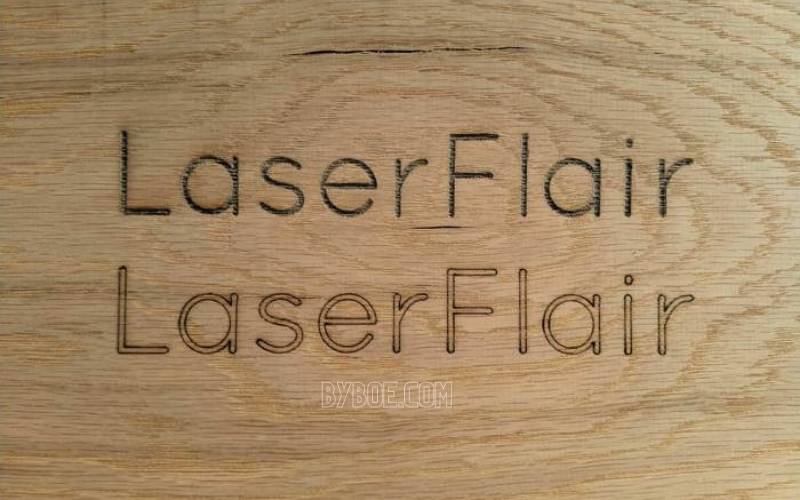
The main difference between a vector cut and a raster engraving is that the laser head moves left to right across the print area, then moves down one hair and continues until the engraving is complete. The laser engraving only traces the lines of the vector cut. Raster engraving takes a lot more time than vector cuts.
It doesn’t matter if your work is art, such as a Celtic knot or a map design mostly made of lines. It can be run as a raster engraving.
This has the advantage of adjusting your line thickness and having different tubes with different thicknesses. It will take longer to engrave.
There is easier to create lines if your vector file is used (not compatible with bitmap images). Your file should be set up as a vector cut.
However, you can reduce the power and speed. To cut through 1/8 inch plywood, I would set the laser power at 100% and speed at 20%.
However, I would increase the capacity to 30% and acceleration to 95% to score the wood. Instead of laser cutting through the material, the laser burns a thin line in it. It is much quicker than engraving. However, the line will be skinny, so you cannot adjust its thickness.
6. For Thinner Vector Lines, Defocus the Laser
My last tip covered using vector settings to score lines into materials to create line art or designs. The downside to this trick is the thin line.
There is an alternative way to get thicker lines. Fiber lasers have a very narrow focus. If you lower the material, the laser will lose focus and spread.
This is done by placing a thin piece of wood about 3/8 inches thick on top of my fabric and having the laser focus on it.
Next, I set the laser to a vector setting with a lower power setting faster. This produces a thicker line than if it was properly focused.
This technique has two drawbacks. The first is that the lines are not as sharp as raster engravings, which are slightly softer.
The laser slows down in the corners to make the corners burn a little deeper. It looks like the corners have tiny dots.
This trick was discovered by a client who wanted large quantities of wooden coasters with a Celtic Knot design inscribed into them.
However, they were limited on budget. The engraving process would have been too time-consuming and expensive (around 5 to 7 minutes per piece). Using a vector score to defocus the art, I reduced the time and still met my budget.
7. Add a Vector Score to the Edge or Engravings
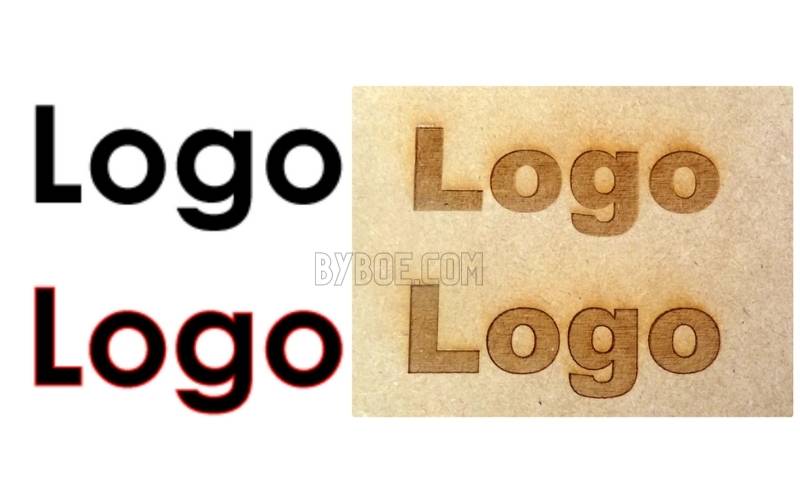
You should generally get sharp edges for any laser engraving (check your focus and lens if you don’t). Here’s a trick to make your engraving edges sharper. You can add a light vector score around the edges of your engraving.
You will again need your image to be saved as a vector. Add a thin stroke around the edge of your image. Set the stroke to a vector cut, but decrease the power and speed.
The laser will burn the edge but not cut it. The laser will burn a thin line along the border after it has finished engraving.
8. Attaining the Target
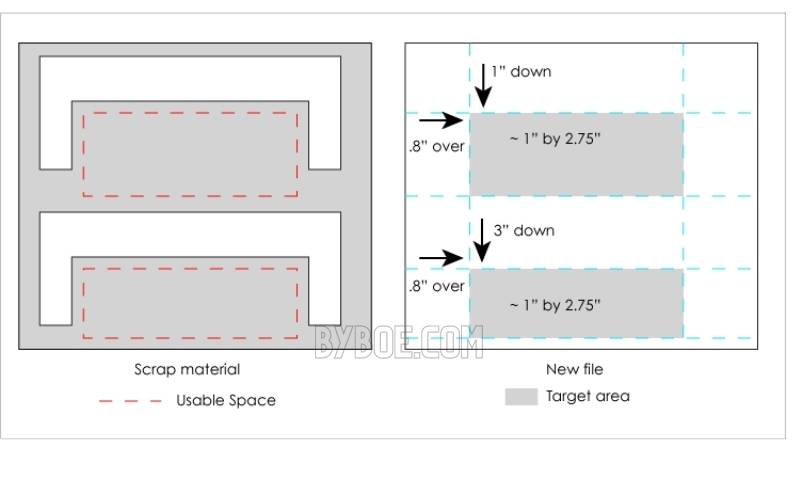
Sometimes you will need to hit a target that isn’t at the origin of your laser. You could take a scrap piece of plastic you have already cut into shapes but still have enough space between the cuts to make a new cut. How do you get your new amount into the space left?
Measure the area you want to cut and then get rough dimensions. You need to ensure enough space for the items you wish to cut. Place the scarp material in a laser and measure from the laser’s source to the target area.
A rectangle measures one by 2 inches in size, 2.5 inches from the top and 1.75″ from the left edge. Next, use guides to mark the target area in your file.
Position it at the same distance from the origin area as the scrap material. Your design or laser cutting out should be placed in the designated area.
Check that your guides don’t print and then run the file. You should cut precisely to the target area if you have measured everything accurately.
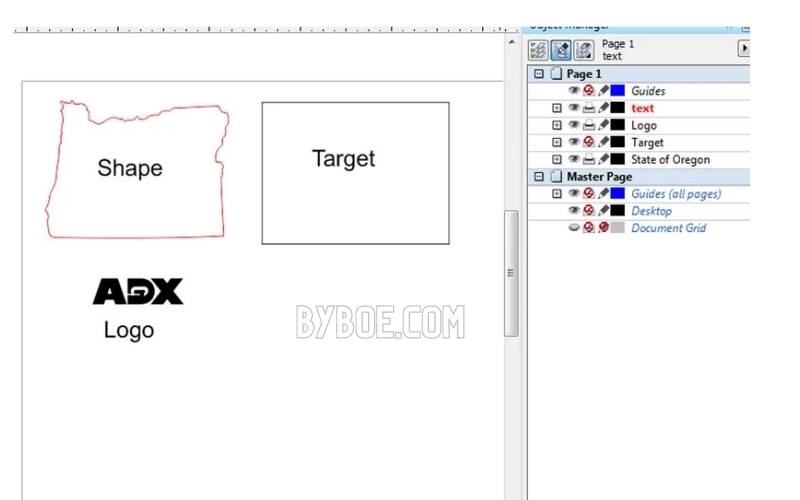
9. Engraving Multiple Objects
Let’s say that you have a lot of wooden coasters you wish to embroider your logo on. One could place them all at once at the laser’s origin and then engrave them individually. It would be much more convenient to have several layouts at once, and laser engrave all of them.
It would help if you made a grid to place the pieces and have the laser accurately engrave them. Make a vector file that is the same size as your laser bed.
Measure one of the shapes/items. It is best to get the exact shape. If not, find an excellent geometric shape like a square or circle that will fit it.
This is your target shape. Position your design (engraving/cut) on the target. Copy the mark and the design, and then paste as many copies of them as possible in the area of your laser bed.
Tip: Make sure to leave enough space between the targets to allow them to be set down without bumping into the ones in front of them.
Move the targets and your design onto one layer before printing the file. Next, turn off printing on the layer that has your plan.
Take a piece of cardboard and cut it to the same size as your laser bed. Then, could you put it in the laser? Make sure that only the target layer is printed. Score, cut, or engrave the target shapes onto the cardboard.
You will now have a grid of cardboard that matches the one in your file. Place the items you want to engrave onto the targets on the cardboard.
Refocus the laser so that the engraving is visible from the top. You can now turn off the printing on the target layer and switch to the printing on the design layer.
You can continue laying out parts if the cardboard isn’t moved. Hit engrave to keep going until all of your pieces are done.
10. Use the Red Dot to Find Where to Engrave or Cut
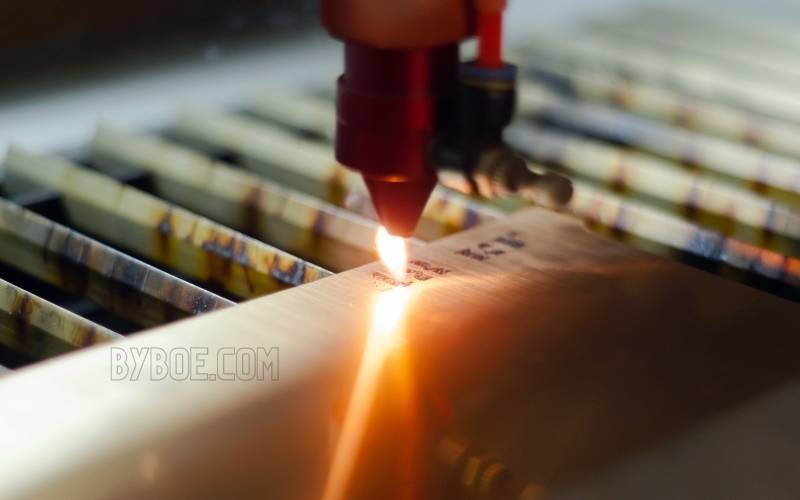
My laser can turn on a laser pointer, which projects a red dot at the location where the laser cutting/engraving light will be firing.
This can be used to determine where the laser will cut your material before you start cutting. Turn off the power supply to the laser, and then turn on the red dot. Run the file, and you will see where the red dots go.
This works best with vector lines where the laser/red dots trace the lines. However, it doesn’t work well with engravings that have the laser passing back and covering the entire engraving area.
To determine where and engraving will end, I use the red dots to trace a square or vector around it. You can also draw horizontal and vertical centers.
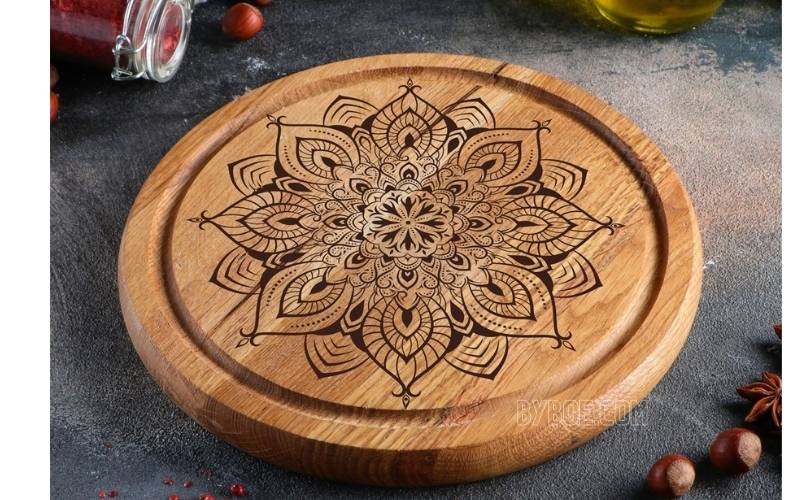
Designing for Laser Engraving
Our six-step guide is a quick read. You can also consult our detailed dossiers to learn more about laser engraving.
You should first be familiar with the differences between vector engraving and raster engraving on different laser engraving materials. This will allow you to design your part in attractive and cost-efficient ways. Learn the differences between these two methods.
Wood is not the same as stone. It is essential to know how different materials react to laser engraving. Laser engraving materials guide – Learn how to create the desired effect on your fabric.
Next, you will need to design using a graphics program such as Gimp or Photoshop for raster files and AutoCAD, Illustrator, or Inkscape (for vector files). Learn more about laser engraving software.
The file should be transferred to the laser engravers. You may use tape depending on the design or materials. However, some laser engravers provide mechanical solutions.
The manufacturer will specify the settings for laser engraving. Presets can be used to speed up the process. Learn the Do and Don’ts for how to keep your laser engravers in top condition. This will help you achieve stunning results.
Use the laser cutter.
It is usually not necessary to post-process laser engraving pieces. Assemble the part if necessary. Attach chains and glue components. In short, work your magic.
Raster Engraving vs. Vector Engraving
Both vector and raster files can be used for laser engraving, laser marking, and laser etching. It would help if you decided which one to use for your design based on its intended purpose.
Raster files (JPG, PNG, etc.) These files are ideal for large engravings such as fillet letters, images, and stamps. Raster engraving is the best format to engrave any photo taken with a camera.
The idea is assembled by adding points gradually to create any shape that you can think of, just like the computer screens. This is sometimes called area laser engraving.
This technique is particularly well-suited for acrylic materials because it gives a beautiful frosted look with a distinct contrast. The result may look uneven if you raster-engrave large glass, stone, or ceramic surfaces.
Vector files (SVG, EPS, etc.) These files are made up of lines traced sequentially onto the surface. Vector engraving is best suited for designs that have small lines and curves.
This approach is sometimes called scoring by professionals. Because the burned outline creates a fantastic contrast with the warm surface, vector engraving is a good choice for wood.
Because the melted system of the laser engraving is not visible, it is less appropriate for acrylic. You can see the differences between both of these methods in the video.
Combining both techniques can produce the best results. The final parts show the raster engraving’s evenly engraved surface and the vector engraving’s crisp outline. This effect is efficient on wood.
Even if you only order one item from an online shop, the difference between these two methods can save you significant money. How do you choose? You should select vector engraving if the surface details are simple and have large shapes.
This is the fastest and most economical laser engraving method. However, if the design is large and contains detailed information, you can choose to raster-engrave. But ultimately, you have to decide what works best for your design.
How to Use Laser Cutters: Conclusion
A laser engraver is a great tool to have in your workshop. It can be used to mark or engrave a variety of materials. To get the best results from your laser engravers, you need to follow simple tips. We hope that our guide can help you know about How to Use a Co2 Laser Engraver.

