The Cricut Engraving Tool is a versatile crafting tool that can be used to create various projects. The device can engrave or cut different materials, including wood, metal, and plastic. If are you looking for a How to Use Cricut Engraving Tool? This is an excellent place for you. Below are some tips and tricks for using this tool correctly to ensure optimal results.
Table of Contents
What Is the Cricut Maker Engraving Tool?
It’s true! It’s possible to engrave using your new Cricut maker. Cricut has added the Cricut Engraving Tool to its ever-expanding specialty tools, increasing the Maker’s capabilities.
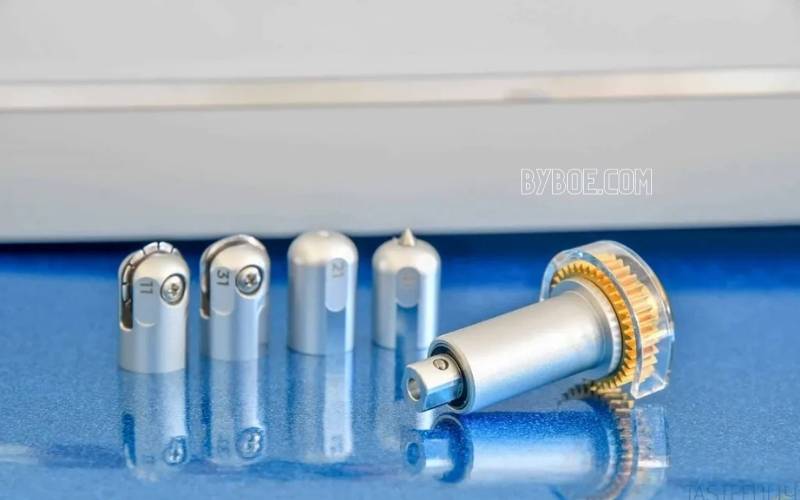
The Engraving Tip is an engraving metal tip with a sharp point. It can apply pressure to inscribe text or images onto various soft metals, acrylics, leather, paper, and other plastics. There are so many possibilities!
The Engraving Tool can engrave many materials, up to 11 inches in width. Cricut recommends that engraving materials not exceed 3/32″ thick (2.4mm), but we have had success with items as high as 1/8″, provided they fit under the Maker’s roller bar.
You will see that the Engraving Tip is part of the Cricut QuickSwap Tool System. It is marked with a number 41, so you can quickly distinguish it from other QuickSwap tips.
How to Use Cricut Engraving Tools
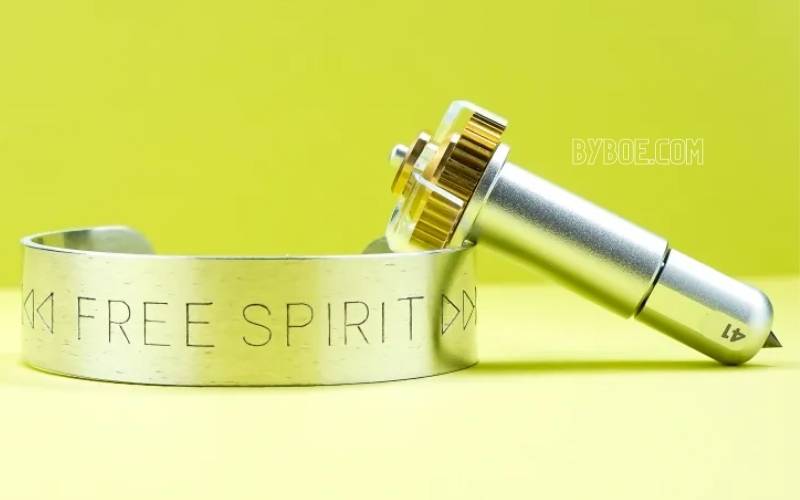
Cricut Engraving Tools
You should have some essential supplies before you start your first engraving project.
Cricut Engraving Tip: This is essential! It is necessary to engrave any material. This Cricut engraving tip can be used to engrave many different materials. The quick swap housing makes it easy to change your Cricut maker tools.
Masking Tape: This is another essential tool that you should have. It is used to tape the edges or corners of the blank to your mat.
Some people engrave with no tape. They end up shifting almost every time, leading to the destruction of their project. This tape is a standard tool for crafters, so I recommend using it.
This mat is a super sticky and robust grip. Your blank will have maximum stay-put power when you use it in conjunction with the masking tape!

What Materials Can You Engrave with The Maker?
You need to be familiar with the limitations of the materials you can engrave on when engraving with the Maker. It would help if you also remembered that not all materials produce the same results and may not have the same finish.
Metals: Anodized aluminum and aluminum are great for engravings. If they are colored, the shiny silver beneath will be revealed. Engraving can also be done on brass plaques, bronze, stainless steel, and pewter.
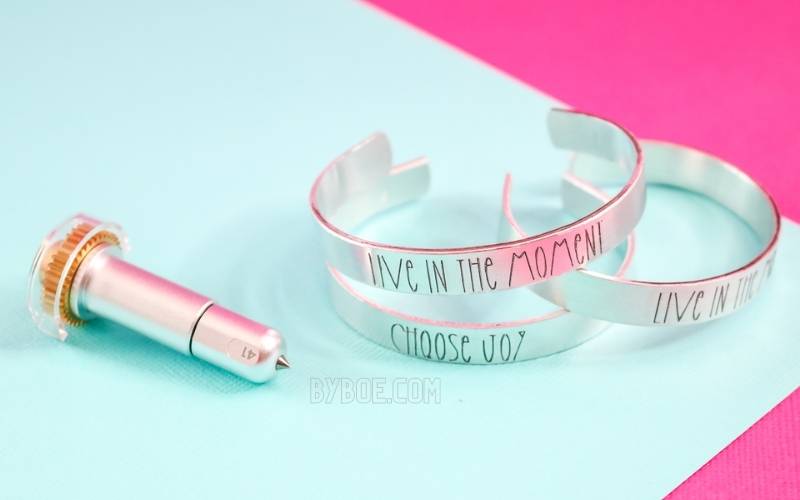
Acrylic: I love the engraving on acrylic blanks. The results are crisp, clear, beautiful. Acrylic can be made up to 2mm thick, but an acrylic blank of 1-1.5 mm thickness produces the best results.
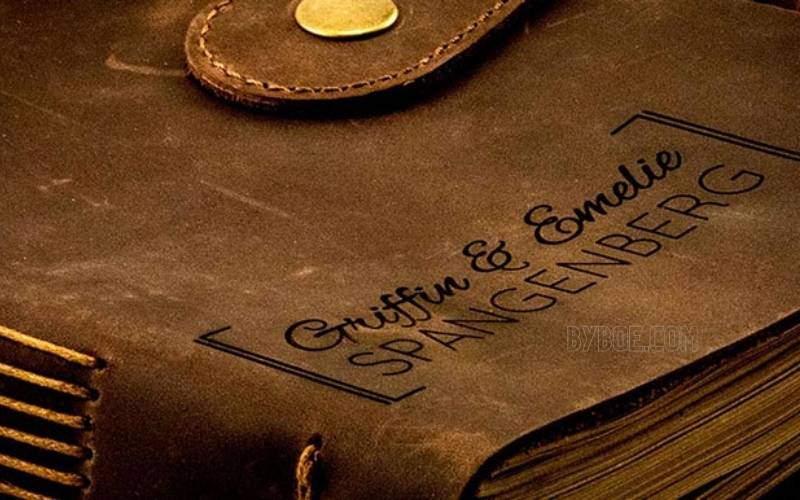
Leather: You can embroider on faux leather, genuine leather, and tooling leather. Just make sure you remove any buttons or rivets that might interfere with the engraving process.
Plastics: Did you know that certain plastics can be engraved? PET plastic panels/sheets are one of my favorite materials. These sheets/panels are thin and lightweight, but they feel like solid plexiglass. The results are excellent.
Transparency film and acetate are also options. Although I haven’t tried it yet, it appears that you can also engrave an old vinyl record. These materials are an affordable way to practice engraving skills.
Wood: Although Cricut balsa sheets can technically be engraved on, I have not yet been able to get a good result with this material. However, artboards like kraft or poster boards can be impressive.
Foil Poster Board: I wanted to start with some of the paper materials to see what the Cricut engraving tip would do. I had used both the scoring wheel and debossed information on the foil poster board, so I tried engraving as well.
The results were horrible! The Cricut engraving tool rips and tears the paper as it runs across it. You can see an up-close view of the damage in the picture below.
Acetate: Now for some materials where the Cricut Engraving Tool worked well! The acetate had a tremendous effect.
I liked it much better than using the deboss on the same material. I did add some ink to the engraving in the image below so you could see it a bit better.
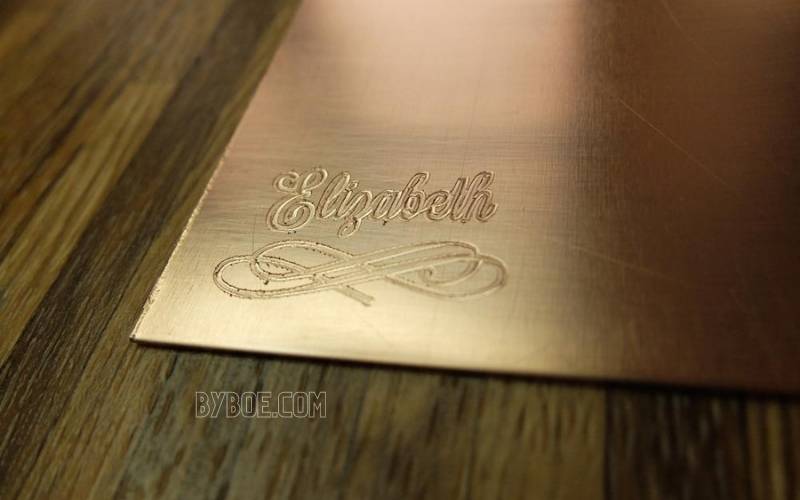
Copper: I shared how to cut copper with your Cricut here, but now that there is an engraving option, it is even better!
The look of copper is fantastic, and directly I can engrave and cut custom pieces. I can see this one as a Christmas ornament during the holidays.
Aluminum: You can’t cut aluminum with your Cricut Maker, but you can engrave it. The Cricut engraving tip works great on this material! I used a 5×7 sheet that was painted black. The Engraving Tip makes the silver of the soft metals show through for a fantastic effect.
You could then frame this piece for a cute piece of art that is all your own. Want to see another project along with tips for locating your engraving on the mat?
What Is The QuickSwap Housing
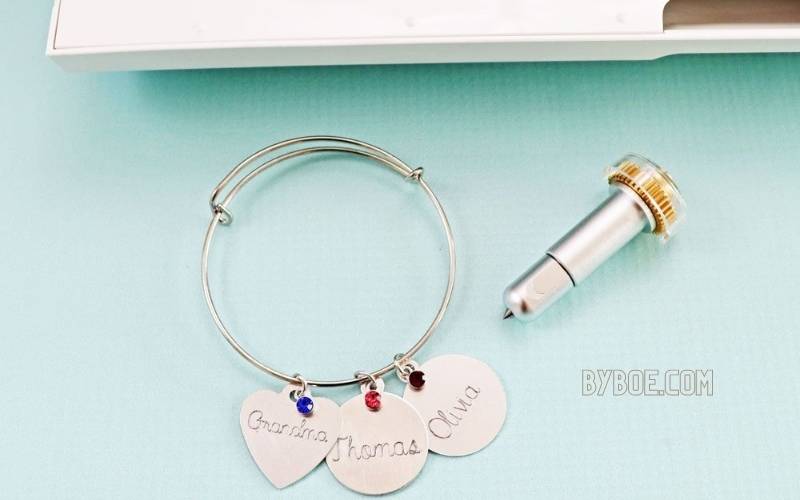
QuickSwap Housing is required to use the Cricut Engraving Tools. This housing is for the tip, the part of the tool that houses the plunger and gear. It allows you to swap between different tools.
The Engraving Tool can be purchased with the housing or just the tip. You don’t need to purchase a second housing if you have an existing tool with QuickSwap Housing, such as the Scoring Wheel. These new Cricut maker tools are expensive! Below are some places you can buy.
How to Create Engravings in Design Space
The digital design and Cricut maker machine settings are the most challenging part of the engraving. I’ve learned through trial and error the best methods to align the engraving on the blank to match my digital engraving design.
This also ensures the highest quality engraving. This is a personal preference and may require practice to achieve the desired results.
Designing Your Engraved Design
Cricut design space allows you to create engraving designs. Your plan must be easy to engrave. Upload an image or insert an equivalent shape to your blank.
Adjust the size accordingly. Next, change the operation set to Cut to Pen. This will allow you to place your blank on the mat exactly as shown on your preview screen.
For example, in the case of a dog tag project, I uploaded the closest image and changed the operation to Pen.
You can create an engraving by entering text in the field and searching for a font compatible with your writing.
Next, change the operation to engrave. Keep the style of writing. This will ensure that your engraving is not a simple outline.
This is unless you want that look. You can fill your engraving image or text using hatch filling, but this method is only for advanced engravers.
Attach the blank to the center, then the engraving, and finally Make It.
Aligning Your Blank on the Mat
The best way to align an engraving blank is to place the template conveniently on the digital mat and then duplicate the placement on the actual one.
Cricut Machines and Material Settings
Depending on the type of engraving, the Cricut machine settings and material settings may vary. I recommend the Tooling Leather 2 mm for the aluminum pet tags for deep engraving. You may need to experiment with different engraving depths to get the right one.
The Cricut Maker does not require you to insert the pin. Instead, let the Cricut Maker draw by outlining your blank. The Cricut Maker will then engrave.
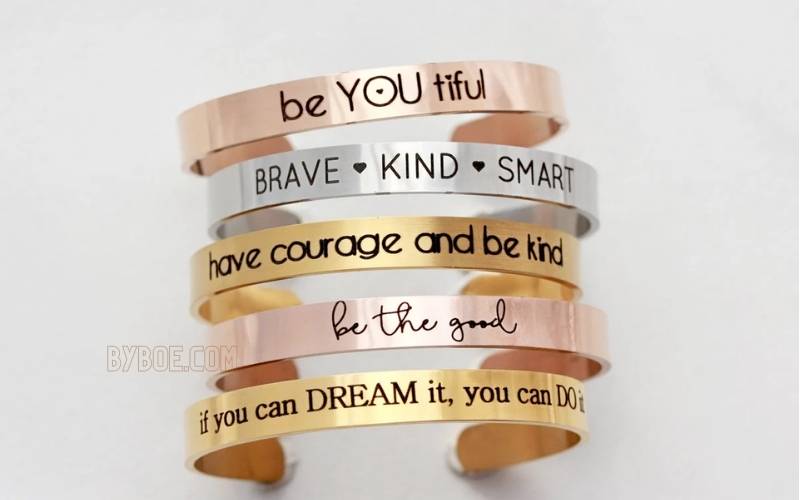
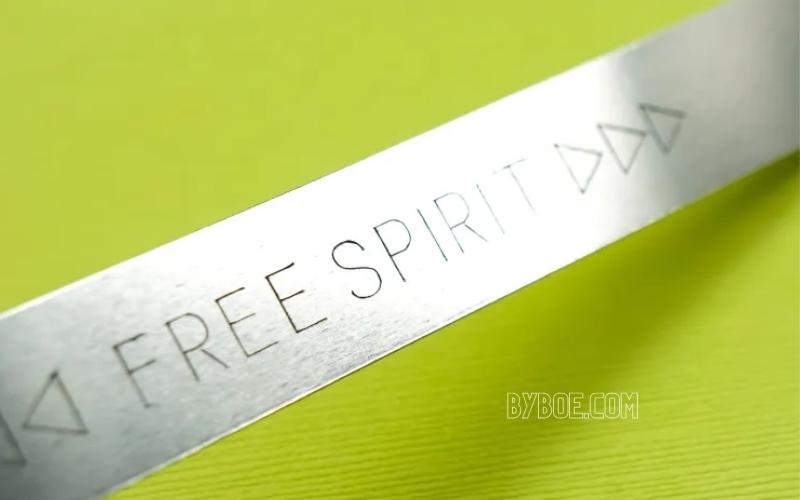
Make An Engraved Metal Bracelet
Create Your Image In Design Space
You can find the file in Cricut design space. You can make your bracelet say whatever you want. Make sure you hit “attach” after making any changes to ensure that your words remain together.
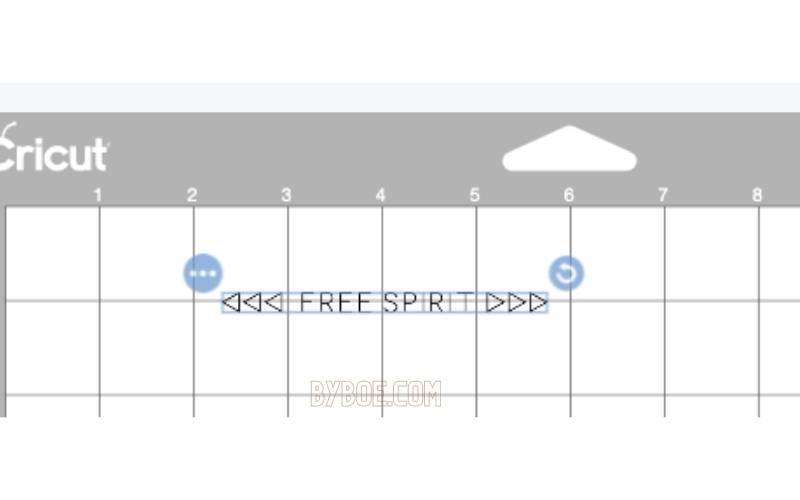
Move your image to the Prepare Screen, centered on your blank. This bracelet is best centered on the 1′” line vertically and 4” horizontally. This is the method I prefer.
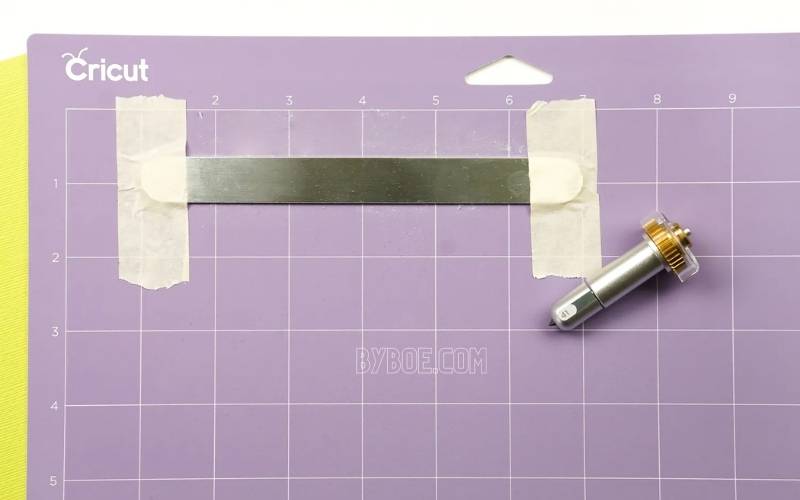
Get your Blanket Ready
Place your blank on the mat exactly where you placed your Design Space image. This is something I have done a few times, and it works. My Cricut cuts slightly higher on my mat than what you see in the preview screen.
My blank was placed somewhat higher than the 1” line. It may take some experimentation. It can draw your image on a “bracelet” of paper to check if it is centered.
Tape the edges of your blank to secure it to the mat. My engraving project has not moved around with me.
Select Aluminum from the material list and place your mat on your Cricut machine. To cut, insert the Engraving tool into your new Cricut maker machine.
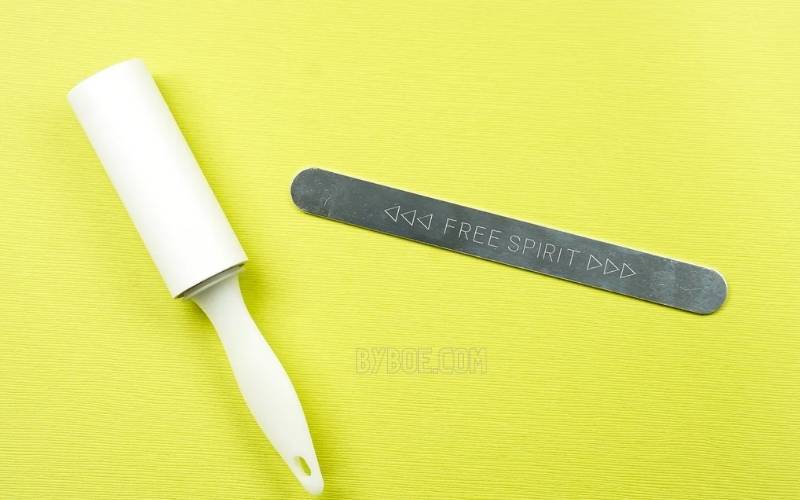
Clean Up Your Bracelet
After your bracelet is finished, be careful with it. Sometimes it may feel hot where the engraving was done or sharp where metal fragments have been removed. To remove any small pieces of metal left behind in the engraving process, use a lint roller and a cloth.
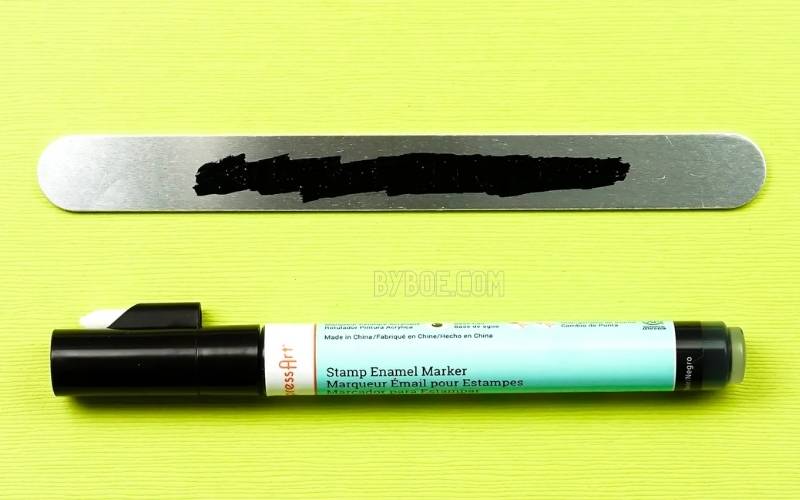
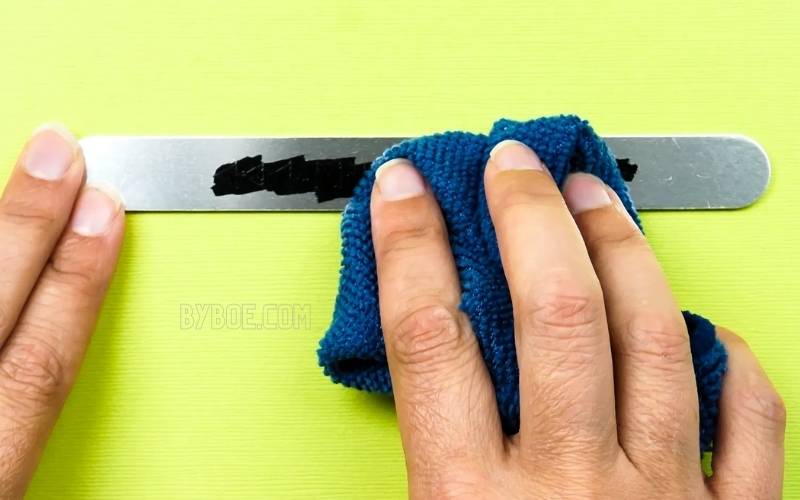
Darken Your Engraving
To make engraved metal projects stand out, I have used plain black craft paint and the ImpressArt antique stamp enamel marker.
You can rub a little paint or ink on your impression, then wipe it off. This creates a darker look for the actual engraving.
Shape Your Bracelet
You can shape your bracelet using the ImpressArt bracelet bend tool.
This project is excellent! Crystal, my friend from Hello Creative Family, created this bracelet. The Bushel and Peck song is my favorite, so I was thrilled to see this bracelet.
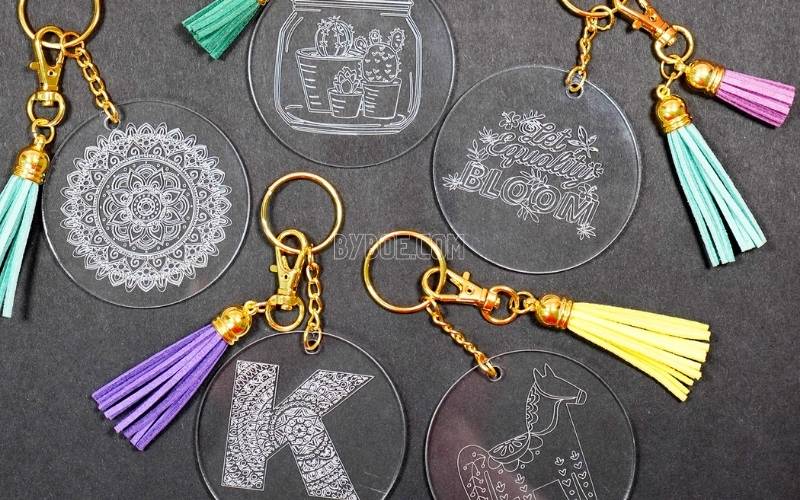
Sharyn, my friend, made an engraved necklace, and Heidi made keychains out of acrylic. This Cricut tool is versatile.
How to Use the Engraving Tool on Cricut? FAQs
Can Cricut Engrave Acrylic?
YES! Acrylic is not listed on Cricut’s official Engraving Tip Compatibility Materials List. However, we can engrave 1/8″ thick acrylic with the Cricut Maker Engraving Tips. It works like magic! Continue reading to see a detailed tutorial on engraving acrylic with the Cricut Maker!
Can the Cricut Maker Engrave Glass?
No. The Cricut Maker Engraving Tip was not made to be used with glass. However, you can use the Cricut to create a stencil and then etch the glass with glass etching cream.
How to Use Engraving Tool on Cricut Maker? Conclusion
The Cricut Engraving Tool is a great way to personalize your belongings. You can use it to engrave your name or initials on your belongings. The Cricut Engraving Tool is easy to use. You need to insert the blade into the tool and then turn on the power.
You can also use the Cricut Engraving Tool to cut designs. It will be faster than other tools and make different cuts for your project. We hope that our guide was helpful.

